Having a strong organic online presence should be a priority to any business, especially at the local level. Google Posts allow you to add up-to-date and timely information about your business, an event, or other material right to your Google My Business listing. This new feature rolled out to all Google My Business profiles in mid-2017, but not very many businesses are making the most of it.
Before beginning with Google Posts, you’ll need to have a claimed Google My Business (GMB) listing and access to your GMB dashboard. Every local business should have already claimed and verified their GMB listing. If you haven’t, you’re significantly decreasing the likelihood that you’ll show up in local searches.
What Are Google Posts?
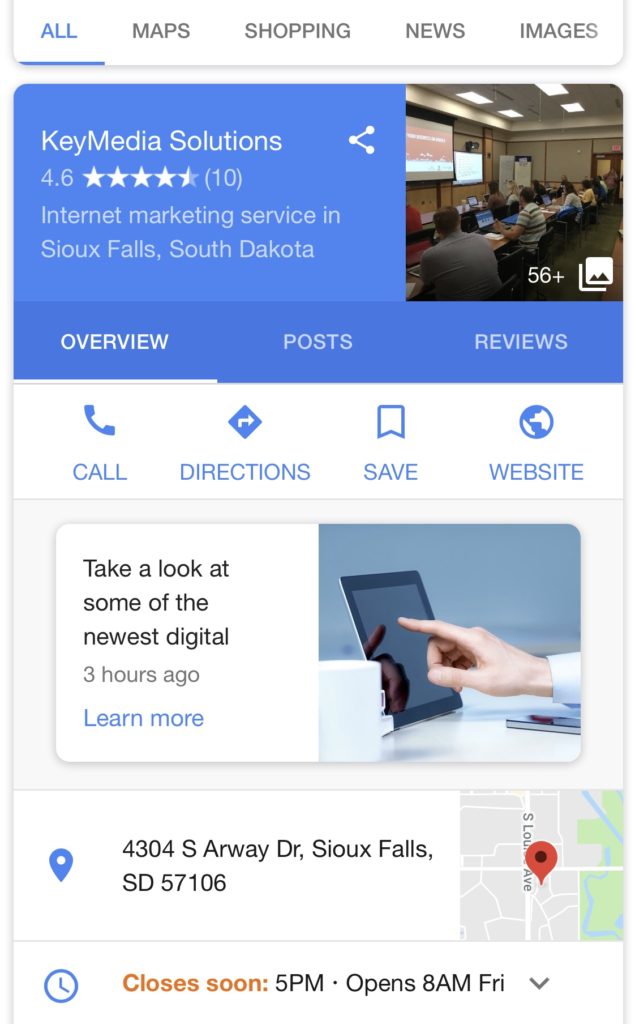
Google Posts are short pieces of content that are featured in Google Search and Maps on a business listing. Posts let businesses feature their events, products, and services to potential customers who may come across their business listing.
Businesses can use posts to:
- Showcase popular products or highlight new products
- Share daily specials or current promotions
- Speed up interactions with customers by setting up one-click paths to reservations, newsletter signups, or even buy products on the website
- Share and promote upcoming events at a business location
How to Set Up Google Posts
As mentioned before, in order to use Google Posts, you must have a verified and claimed Google My Business listing. From there, you’ll want to go to your Google My Business account to add or edit your Posts.
Here’s how to add your first Google Post:
- Once you’re signed into Google My Business, you’ll select the location of the business you want to add a post to. Please note, Posts are not currently available for businesses who provide lodging or accommodation services (e.g. hotels). Before writing any Post, familiarize yourself with Google’s Post Content Policy to find what type of content can and cannot be included in your posts.
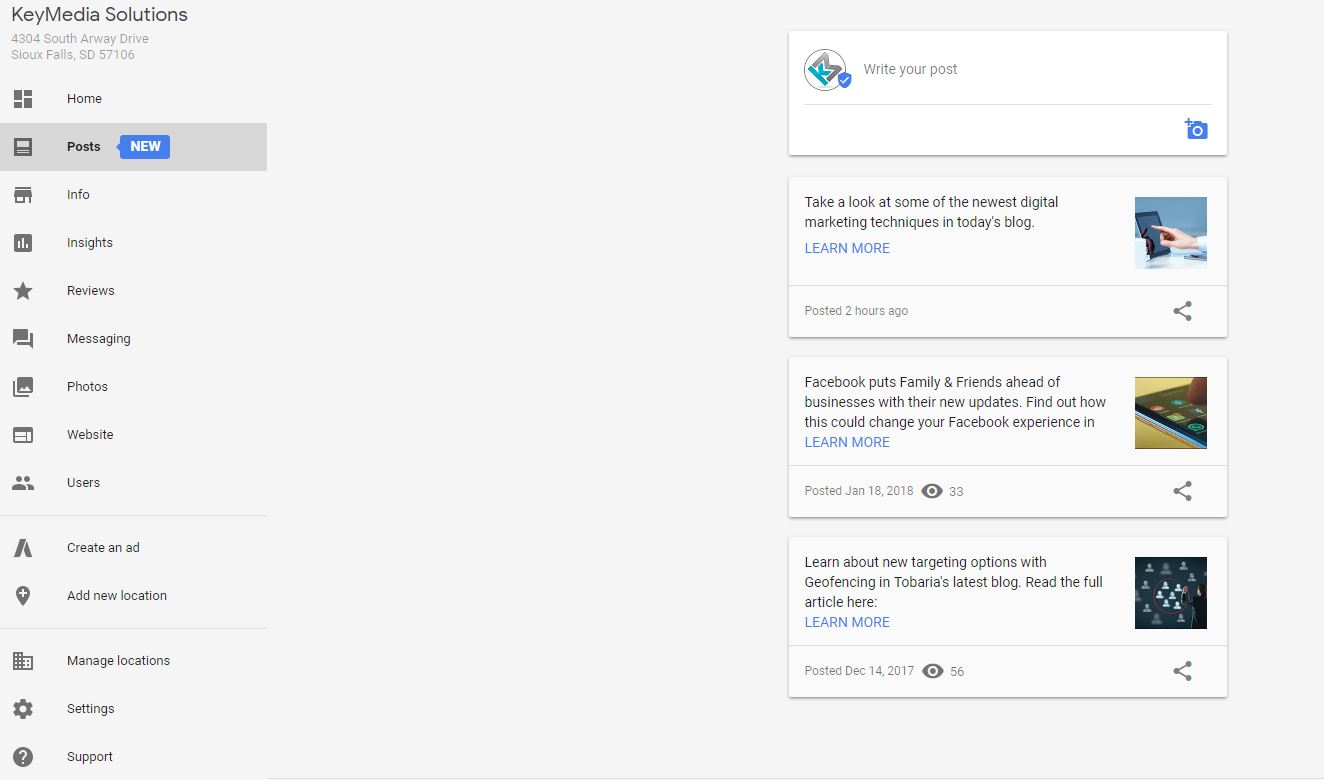
- On the right hand side of your GMB manager, you will see Posts. Once you click into the section, you will be shown all of your past posts and given the option to add new ones.
- Be clear about the information in your post. You have the ability to add up to 1,500 characters, but the ideal posts should be between 100-300 words. Add a high-resolution photo reinforcing your message so that your photo will stand out. (Photos should be: Simple, direct, and in-focus. Well-lit, with bright, vibrant colors. At a minimum resolution of 720px wide by 540px tall, in JPG or PNG format.)
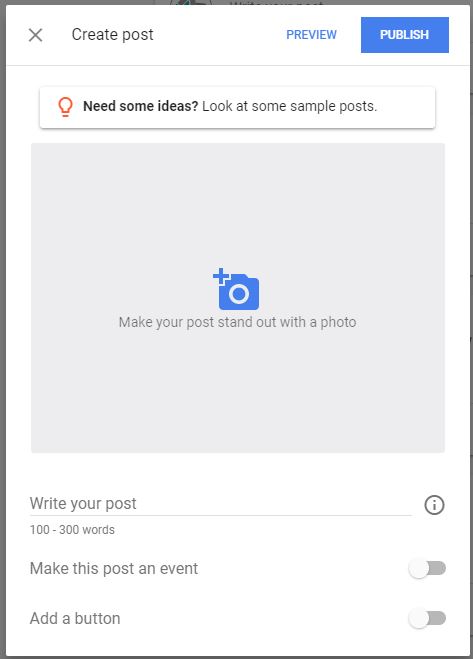
- For an event Post, you can add a title, start/end date as well as start/end times. It’s important to keep these accurate so that potential customers find the most up-to-date information about your business. The post will expire in 7 days, or after the event date has passed.
- Finally, be sure to use the ‘Add a Button’ feature to entice visitors to take a desired action. (Current available buttons: Book, Order Online, Buy, Learn More, Sign Up, and Get Offer)
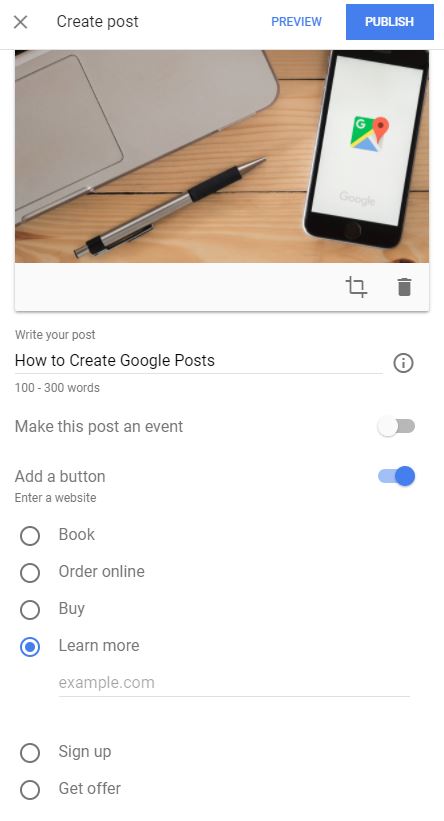
Fun Fact: You are not limited to one Post and any given time. Posts will be shown as carousels in dated order, so feel free to have multiple Posts live at a time!
How to View Post Insights
You’ve created the perfect Post, now what? In the same section that you go to create Posts, you can actually check on the performance of your current and past content. Google reports on the times your post was seen as well as the times a customer clicked on your post button. It can take 2-3 days for insights to be updated, so be patient if you don’t see data right away.
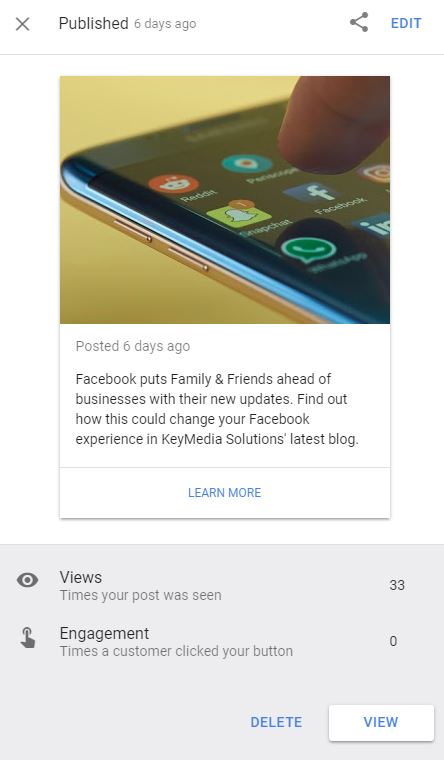
Get Posting
Google Posts are relatively new and many businesses are not utilizing the free space to bring more value to their local search presence. When people are searching for your business or industry, it is important to stand out and give customers useful information about your business, Google Posts are a free and easy way to do just that.